|
如何创建自己 MCP 的服务器
一、开始使用模型上下文协议 (MCP) MCP 是一个开放协议,它规范了应用程序向 LLM 提供上下文的方式。MCP 就像 AI 应用程序的 USB-C 端口一样。 正如 USB-C 提供了一种标准化的方式将您的设备连接到各种外围设备和配件一样,MCP 也提供了一种标准化的方式将 AI 模型连接到不同的数据源和工具。
1、为什么选择 MCP? MCP 可帮助您在 LLM 之上构建代理和复杂的工作流。LLM 通常需要与数据和工具集成,而 MCP 可提供以下功能: - 越来越多的预建集成可供您的 LLM 直接插入
- 在 LLM 提供商和供应商之间切换的灵活性
- 保护基础架构内数据的最佳实践
2、总体架构 MCP 的核心遵循客户端-服务器架构,其中主机应用程序可以连接到多个服务器:
- MCP 主机:像 Claude Desktop、IDE 或 AI 工具这样的程序,需要通过 MCP 访问数据
- MCP 客户端:与服务器保持 1:1 连接的协议客户端
- MCP 服务器:轻量级程序,每个程序都通过标准化模型上下文协议公开特定功能
- 本地数据源:MCP 服务器可以安全访问的您计算机上的文件、数据库和服务
- 远程服务:MCP 服务器可以通过互联网(例如通过 API)连接到的外部系统
二、开发服务端
开始构建您自己的服务器,以便在 Claude for Desktop 和其他客户端中使用。 在本教程中,我们将构建一个简单的 MCP 天气服务器,并将其连接到主机 Claude for Desktop。我们将从基本设置开始,然后逐步介绍更复杂的用例。
1、我们将要构建什么 目前,许多 LLM 课程无法获取天气预报和恶劣天气警报。让我们使用 MCP 来解决这个问题! 我们将构建一个服务器,其中包含两个工具:get-alerts和get-forecast。然后,我们将服务器连接到 MCP 主机(在本例中为 Claude for Desktop):
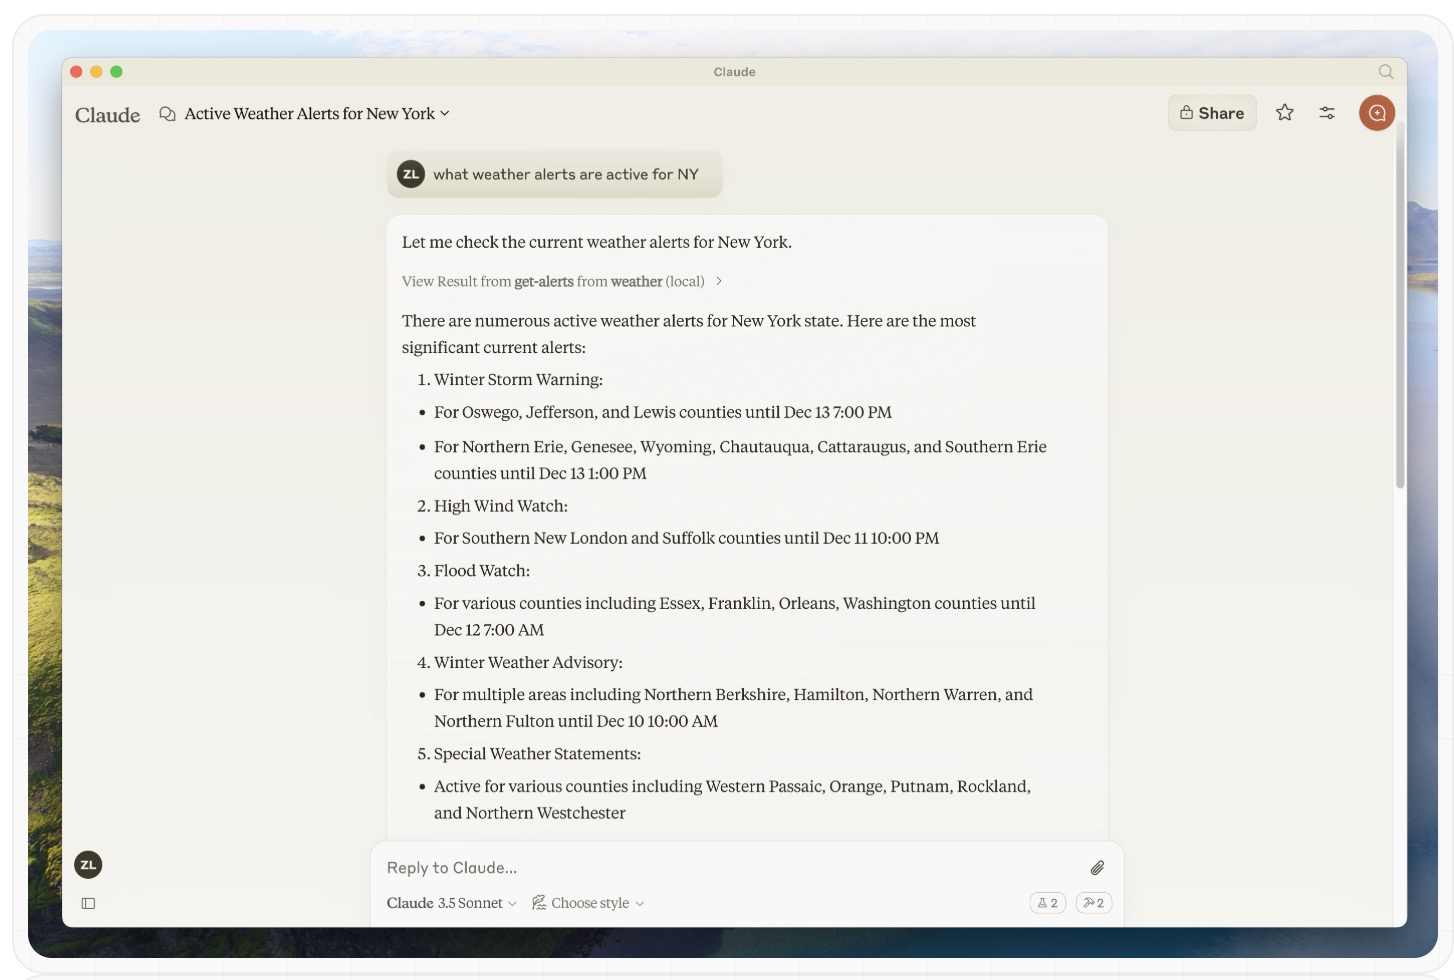
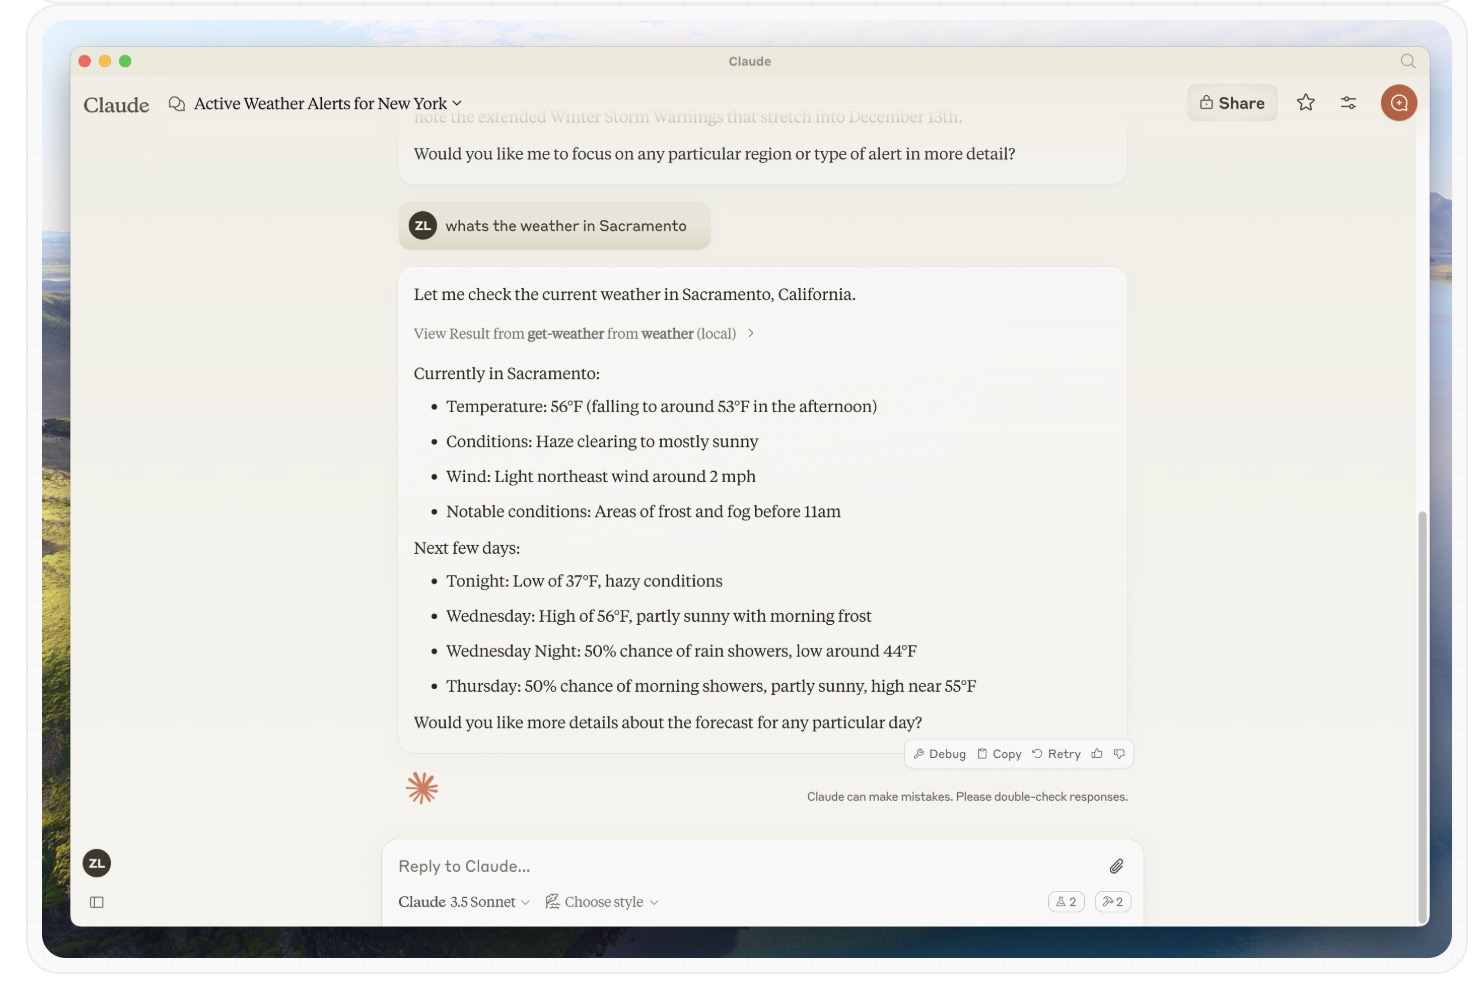
2、核心 MCP 概念 MCP 服务器可以提供三种主要类型的功能: - 资源:客户端可以读取的类似文件的数据(例如 API 响应或文件内容)
- 工具:可由 LLM 调用的函数(经用户批准)
- 提示:预先编写的模板,帮助用户完成特定任务
让我们开始构建我们的天气服务器
3、开发语言 - C#
系统要求
安装.NET 8 SDK或更高版本
这是系统环境
- dotnet <font color="#0000ff">--version</font>
现在,让我们创建并设置您的项目:
- # Create a new directory for our project
- mkdir weather
- cd weather
- # Initialize a new C# project
- dotnet new console
运行 dotnet new console ,你会看到一个新的C#的项目,当然我们可以在微软的VS开发工具中打开项目。
我们可以使用VS项目向导创建一个C#应用程序。
创建项目后,添加大模型MCP SDK和托管NuGet包:
- # Add the Model Context Protocol SDK NuGet package
- <font color="#ff0000">dotnet</font> add package ModelContextProtocol <font color="#0000ff">--prerelease</font>
- # Add the .NET Hosting NuGet package
- <font color="#ff0000">dotnet</font> add package Microsoft.Extensions.Hosting
现在让我们开始构建服务器。
4、构建服务器
在您的项目中打开该Program.cs文件并将其内容替换为以下代码
using Microsoft.Extensions.DependencyInjection;
using Microsoft.Extensions.Hosting;
using ModelContextProtocol;
using System.Net.Http.Headers;
var builder = Host.CreateEmptyApplicationBuilder(settings: null);
builder.Services.AddMcpServer()
.WithStdioServerTransport()
.WithToolsFromAssembly();
builder.Services.AddSingleton(_ =>
{
var client = new HttpClient() { BaseAddress = new Uri("https://api.weather.gov") };
client.DefaultRequestHeaders.UserAgent.Add(new ProductInfoHeaderValue("weather-tool", "1.0"));
return client;
});
var app = builder.Build();
await app.RunAsync();
提示:创建 时ApplicationHostBuilder,请确保使用CreateEmptyApplicationBuilder而不是CreateDefaultBuilder。这可确保服务器不会向控制台写入任何其他消息。这仅适用于使用 STDIO 传输的服务器。
此代码设置了一个基本的控制台应用程序,该应用程序使用模型上下文协议 SDK 创建具有标准 I/O 传输的 MCP 服务器。
5、天气 API 辅助函数 创建一个扩展类,HttpClient有助于简化 JSON 请求处理: using System.Text.Json;
internal static class HttpClientExt { public static async Task<JsonDocument> ReadJsonDocumentAsync(this HttpClient client, string requestUri) { using var response = await client.GetAsync(requestUri); response.EnsureSuccessStatusCode(); return await JsonDocument.ParseAsync(await response.Content.ReadAsStreamAsync()); } }
接下来,定义一个包含工具执行处理程序的类,用于查询和转换来自国家气象局 API 的响应:
using ModelContextProtocol.Server; using System.ComponentModel; using System.Globalization; using System.Text.Json;
namespace QuickstartWeatherServer.Tools;
[McpServerToolType] public static class WeatherTools { [McpServerTool, Description("Get weather alerts for a US state.")] public static async Task<string> GetAlerts( HttpClient client, [Description("The US state to get alerts for.")] string state) { using var jsonDocument = await client.ReadJsonDocumentAsync($"/alerts/active/area/{state}"); var jsonElement = jsonDocument.RootElement; var alerts = jsonElement.GetProperty("features").EnumerateArray();
if (!alerts.Any()) { return "No active alerts for this state."; }
return string.Join("\n--\n", alerts.Select(alert => { JsonElement properties = alert.GetProperty("properties"); return $""" Event: {properties.GetProperty("event").GetString()} Area: {properties.GetProperty("areaDesc").GetString()} Severity: {properties.GetProperty("severity").GetString()} Description: {properties.GetProperty("description").GetString()} Instruction: {properties.GetProperty("instruction").GetString()} """; })); }
[McpServerTool, Description("Get weather forecast for a location.")] public static async Task<string> GetForecast( HttpClient client, [Description("Latitude of the location.")] double latitude, [Description("Longitude of the location.")] double longitude) { var pointUrl = string.Create(CultureInfo.InvariantCulture, $"/points/{latitude},{longitude}"); using var jsonDocument = await client.ReadJsonDocumentAsync(pointUrl); var forecastUrl = jsonDocument.RootElement.GetProperty("properties").GetProperty("forecast").GetString() ?? throw new Exception($"No forecast URL provided by {client.BaseAddress}points/{latitude},{longitude}");
using var forecastDocument = await client.ReadJsonDocumentAsync(forecastUrl); var periods = forecastDocument.RootElement.GetProperty("properties").GetProperty("periods").EnumerateArray();
return string.Join("\n---\n", periods.Select(period => $""" {period.GetProperty("name").GetString()} Temperature: {period.GetProperty("temperature").GetInt32()}°F Wind: {period.GetProperty("windSpeed").GetString()} {period.GetProperty("windDirection").GetString()} Forecast: {period.GetProperty("detailedForecast").GetString()} """)); } }
运行服务器 最后,使用以下命令运行服务器: - <font face="微软雅黑" size="3">dotnet run</font>
使用 Claude for Desktop 测试您的服务器
首先,请确保您已安装 Claude for Desktop。您可以在此处安装最新版本。如果您已安装 Claude for Desktop,请确保将其更新到最新版本。 我们需要为您想要使用的任何 MCP 服务器配置 Claude for Desktop。为此,请在~/Library/Application Support/Claude/claude_desktop_config.json文本编辑器中打开您的 Claude for Desktop App 配置。如果该文件不存在,请务必创建。例如,如果您安装了VS Code:
- <font face="微软雅黑" size="3">code $env:AppData\Claude\claude_desktop_config.json</font>
然后,您需要在密钥中添加服务器mcpServers。只有至少一台服务器正确配置后,MCP UI 元素才会显示在 Claude 桌面版中。在本例中,我们将像这样添加单个天气服务器:
- <font face="微软雅黑" size="3" color="#696969">{
- "mcpServers": {
- "weather": {
- "command": "dotnet",
- "args": [
- "run",
- "--project",
- "C:\\ABSOLUTE\\PATH\\TO\\PROJECT",
- "--no-build"
- ]
- }
- }
- }</font>
这告诉 Claude for Desktop: - 有一个名为“天气”的 MCP 服务器
- 通过运行dotnet run /ABSOLUTE/PATH/TO/PROJECT “保存”文件来启动它,然后重新启动Claude for Desktop。
使用命令进行测试让我们确保 Claude for Desktop 能够获取我们在weather服务器中公开的两个工具。您可以通过查找“搜索和工具”图标来执行此操作:
单击滑块图标后,您应该会看到列出两个工具:
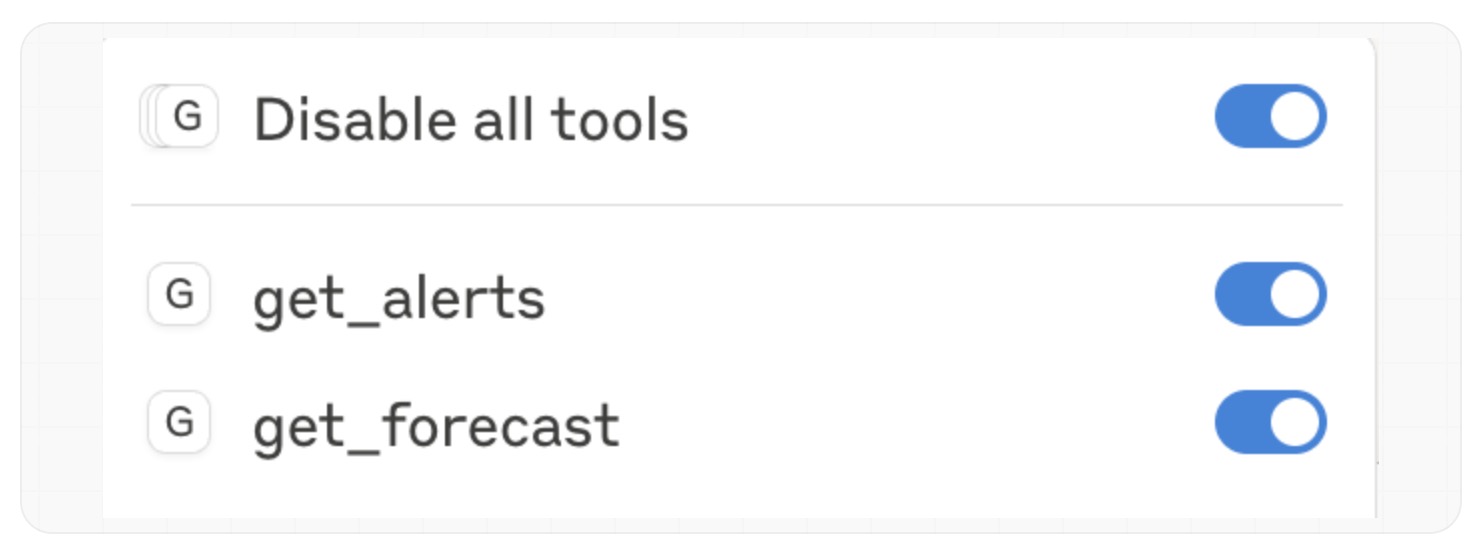
如果您的服务器未被 Claude for Desktop 接收,请继续执行故障排除部分以获取调试提示。 如果工具设置图标已显示,您现在可以通过在 Claude for Desktop 中运行以下命令来测试您的服务器: - 萨克拉门托的天气怎么样?
- 德克萨斯州有哪些有效天气警报?
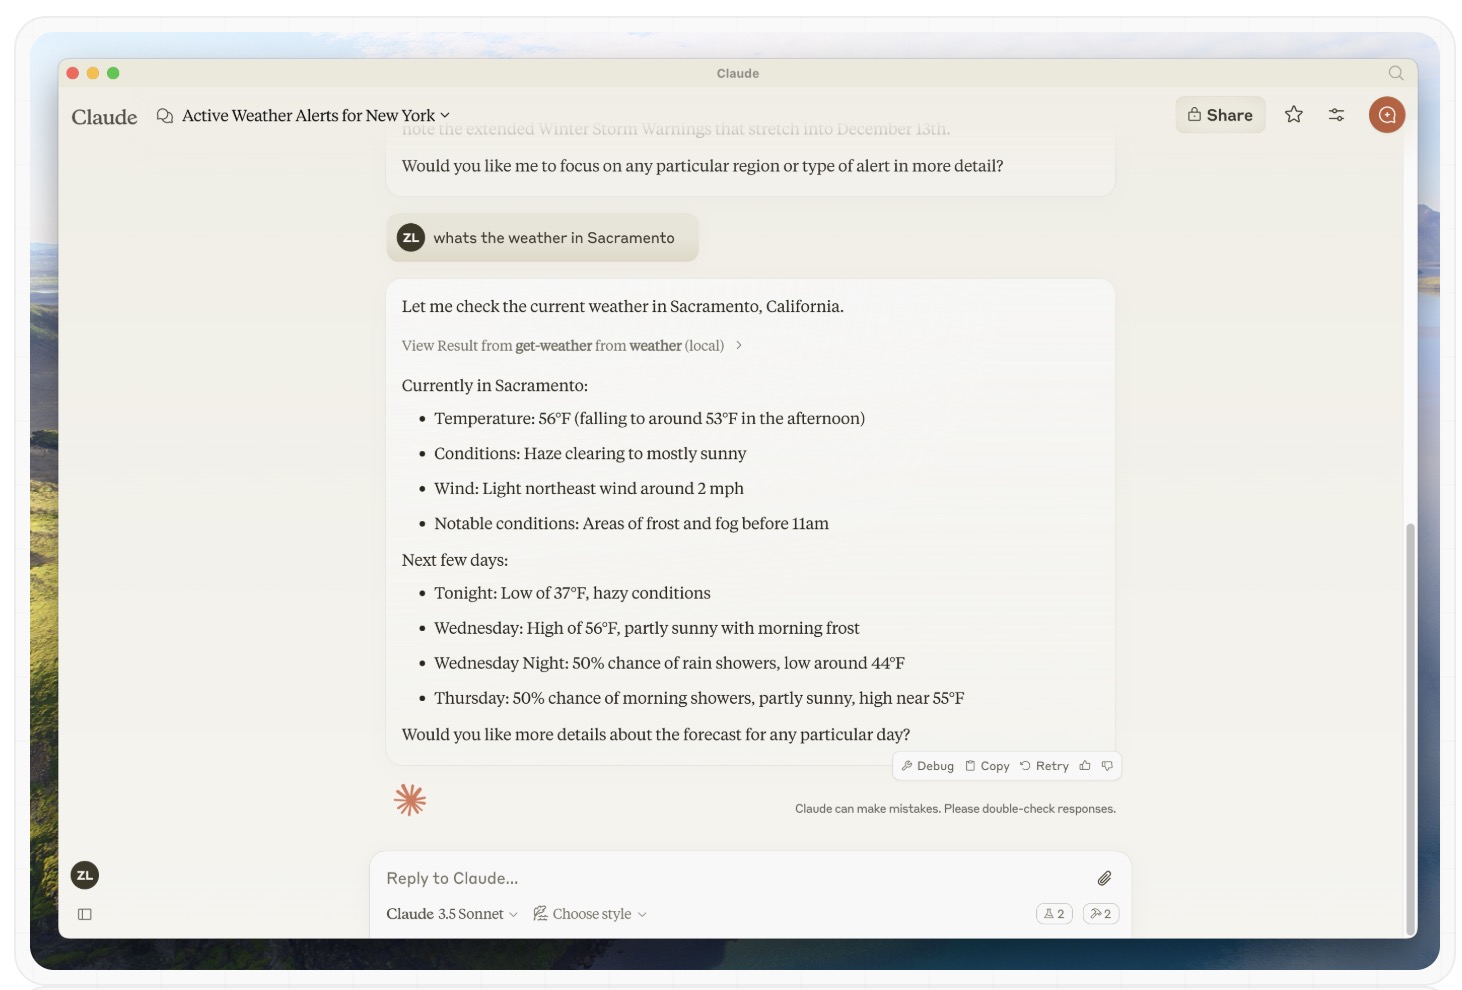
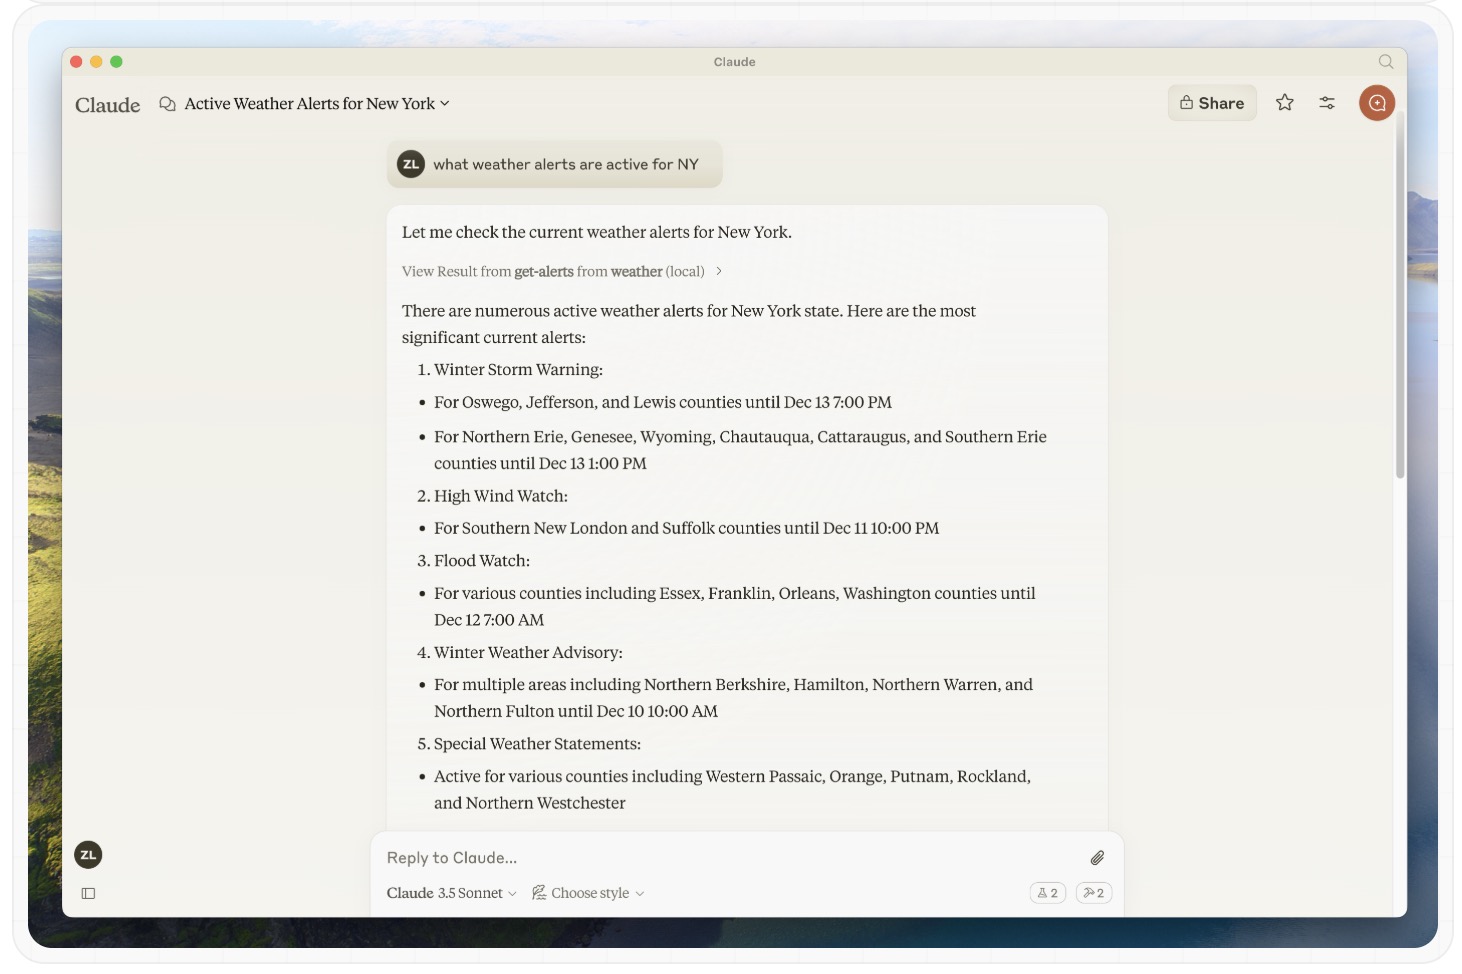
回顾一下这个过程背后发生了什么 当你问一个问题时: - 客户将您的问题发送给 Claude
- Claude 分析可用的工具并决定使用哪一个
- 客户端通过 MCP 服务器执行所选工具
- 结果被发回给克劳德
- Claude 制定了自然语言回应
- 答案已显示给您!
三、开发客户端
开发语言 - Python
开始构建可以与所有 MCP 服务器集成的自己的客户端。 在本教程中,您将学习如何构建一个基于 LLM 的聊天机器人客户端,并连接到 MCP 服务器。如果您已经阅读过服务器快速入门指南,它将指导您完成构建第一个服务器的基础知识。
系统要求 开始之前,请确保您的系统满足以下要求: - Mac 或 Windows 电脑
- 已安装最新的 Python 版本
- uv已安装的最新版本
设置您的环境 首先,创建一个新的 Python 项目uv # Create project directory uv init mcp-client cd mcp-client
# Create virtual environment uv venv
# Activate virtual environment # On Windows: .venv\Scripts\activate # On Unix or MacOS: source .venv/bin/activate
# Install required packages uv add mcp anthropic python-dotenv
# Remove boilerplate files # On Windows: del main.py # On Unix or MacOS: rm main.py
# Create our main file touch client.py
设置您的API密钥 创建一个.env文件来存储它:
# Create .env file touch .env
将您的密钥添加到.env文件中:
ANTHROPIC_API_KEY=<your key here>
添加.env到您的.gitignore
echo ".env" >> .gitignore
创建客户端
基本客户端结构首先,让我们设置导入并创建基本客户端类:
import asyncio from typing import Optional from contextlib import AsyncExitStack
from mcp import ClientSession, StdioServerParameters from mcp.client.stdio import stdio_client
from anthropic import Anthropic from dotenv import load_dotenv
load_dotenv() # load environment variables from .env
class MCPClient: def __init__(self): # Initialize session and client objects self.session: Optional[ClientSession] = None self.exit_stack = AsyncExitStack() self.anthropic = Anthropic() # methods will go here
服务器连接管理
接下来,我们将实现连接 MCP 服务器的方法:
async def connect_to_server(self, server_script_path: str): """Connect to an MCP server
Args: server_script_path: Path to the server script (.py or .js) """ is_python = server_script_path.endswith('.py') is_js = server_script_path.endswith('.js') if not (is_python or is_js): raise ValueError("Server script must be a .py or .js file")
command = "python" if is_python else "node" server_params = StdioServerParameters( command=command, args=[server_script_path], env=None )
stdio_transport = await self.exit_stack.enter_async_context(stdio_client(server_params)) self.stdio, self.write = stdio_transport self.session = await self.exit_stack.enter_async_context(ClientSession(self.stdio, self.write))
await self.session.initialize()
# List available tools response = await self.session.list_tools() tools = response.tools print("\nConnected to server with tools:", [tool.name for tool in tools])
查询处理逻辑 现在让我们添加处理查询和处理工具调用的核心功能:
async def process_query(self, query: str) -> str: """Process a query using Claude and available tools""" messages = [ { "role": "user", "content": query }
response = await self.session.list_tools() available_tools = [{ "name": tool.name, "description": tool.description, "input_schema": tool.inputSchema
# Initial Claude API call response = self.anthropic.messages.create( model="claude-3-5-sonnet-20241022", max_tokens=1000, messages=messages, tools=available_tools )
# Process response and handle tool calls final_text = []
assistant_message_content = [] for content in response.content: if content.type == 'text': final_text.append(content.text) assistant_message_content.append(content) elif content.type == 'tool_use': tool_name = content.name tool_args = content.input
# Execute tool call result = await self.session.call_tool(tool_name, tool_args) final_text.append(f"[Calling tool {tool_name} with args {tool_args}]")
assistant_message_content.append(content) messages.append({ "role": "assistant", "content": assistant_message_content }) messages.append({ "role": "user", "content": [ { "type": "tool_result", "tool_use_id": content.id, "content": result.content } })
# Get next response from Claude response = self.anthropic.messages.create( model="claude-3-5-sonnet-20241022", max_tokens=1000, messages=messages, tools=available_tools )
final_text.append(response.content[0].text)
return "\n".join(final_text)
交互式聊天界面 现在我们将添加聊天循环和清理功能:
async def chat_loop(self): """Run an interactive chat loop""" print("\nMCP Client Started!") print("Type your queries or 'quit' to exit.")
while True: try: query = input("\nQuery: ").strip()
if query.lower() == 'quit': break
response = await self.process_query(query) print("\n" + response)
except Exception as e: print(f"\nError: {str(e)}")
async def cleanup(self): """Clean up resources""" await self.exit_stack.aclose()
主入口 最后,我们添加主要的执行逻辑: async def main(): if len(sys.argv) < 2: print("Usage: python client.py <path_to_server_script>") sys.exit(1)
client = MCPClient() try: await client.connect_to_server(sys.argv[1]) await client.chat_loop() finally: await client.cleanup()
if __name__ == "__main__": import sys asyncio.run(main())
关键组件说明 - 该类 MCPClient 使用会话管理和 API 客户端进行初始化
- 用于 AsyncExitStack 适当的资源管理
- 配置 Anthropic 客户端以进行 Claude 交互
2. 服务器连接 - 支持 Python 和 Node.js 服务器
- 验证服务器脚本类型
- 建立适当的沟通渠道
- 初始化会话并列出可用工具
3.查询处理 - 保持对话上下文
- 处理 Claude 的回应 和工具调用
- 管理 Claude 和工具之间的消息流
- 将结果整合成一个连贯的响应
4. 交互界面 - 提供简单的命令行界面
- 处理用户输入并显示响应
- 包括基本的错误处理
- 允许正常退出
5.资源管理 常见定制点 1、工具处理
- 修改 process_query() 以处理特定的工具类型
- 为工具调用添加自定义错误处理
- 实施特定于工具的响应格式
2、响应处理
- 自定义工具结果的格式
- 添加响应过滤或转换
- 实现自定义日志记录
3、用户界面
- 添加 GUI 或 Web 界面
- 实现丰富的控制台输出
- 添加命令历史记录或自动完成
运行客户端 要使用任何 MCP 服务器运行您的客户端 - uv run client.py path/to/server.py # python server
- uv run client.py path/to/build/index.js # node server
如果您继续服务器快速入门中的天气教程,您的命令可能看起来像这样:python client.py .../quickstart-resources/weather-server-python/weather.py
客户将 1、连接到指定服务器 2、列出可用的工具 3、启动交互式聊天会话,您可以: - 输入查询 - 查看工具执行 - 获得 Claude 的回复
下面是从服务器快速启动连接到天气服务器时的示例:
工作原理
当您提交查询时: 1、客户端从服务器获取可用工具列表 2、您的查询将连同工具描述一起发送给 Claude 3、Claude决定使用哪些工具(如果有的话) 4、客户端通过服务器执行任何请求的工具调用 5、结果发回给Claude 6、Claude提供自然语言回应 7、响应将显示给您
最佳实践
错误处理 1、始终将工具调用包装在 try-catch 块中 2、提供有意义的错误消息 3、妥善处理连接问题
资源管理 1、用于 AsyncExitStack 适当的清理 2、完成后关闭连接 3、处理服务器断开连接
安全 1、安全地存储 API 密钥.env 2、验证服务器响应 3、谨慎使用工具权限
|